This is for me the final solution for outdoor and temporary activity…. little weight to carry, small pack, ready to go in 10 minuts, and most important things, ALL BAND WORKABLE !!! From 10 to 80 meter….
Unique important condition it is to have an autotuner, but today almost every transceiver has one.. so really not a problem !

If you google “rybacov antenna” will comes out a lot of different projects and opinions, lot of people that says ” doesn’t works “….. unuseful to write a lot… if you have 30 minuts time and about 50 €uro just try to build… and see by yourself if works. I can just say that in the last 2 years I have used just this antenna for all my outdoor acitvity… last summer I made more then 50 countries in about one month, just using 100 watt …. good enough !
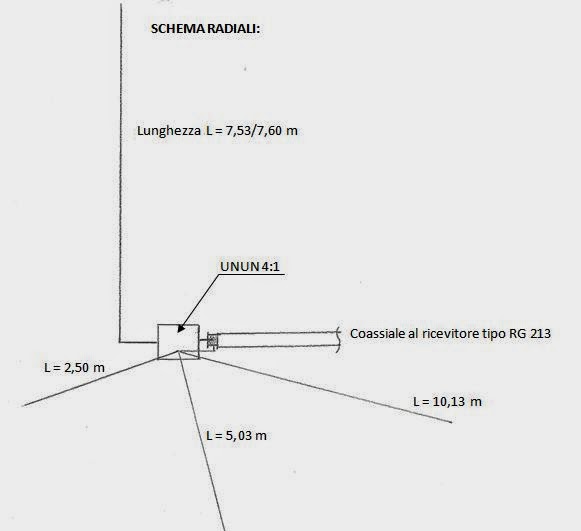
Here below the project I used to build the antenna ….. Let me thank you Riccardo IU2DXI, which he allow me to reproduce his article and photos … let’s start with an easy pics that show very good the antenna …
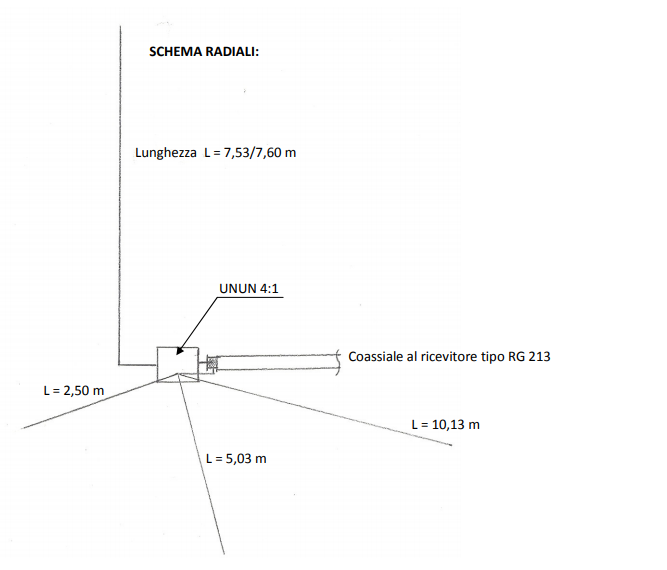
As you can see not much to explain… just follow the measure of the pics !!
Let’s start collecting what you need to build up your new antenna !
- FIBERGLASS Fishing rod 10 meters lenght
- About 30 meters eletric wire 2mm
- PVC Tube diameter 50mm for coil UN UN …. 30 cm lenght is more then enough
- About 3 meter twin audio cable
- n. 1 SO 239 panel
- Plastic box IP65
- Cable ties, scotch tapes, knife….
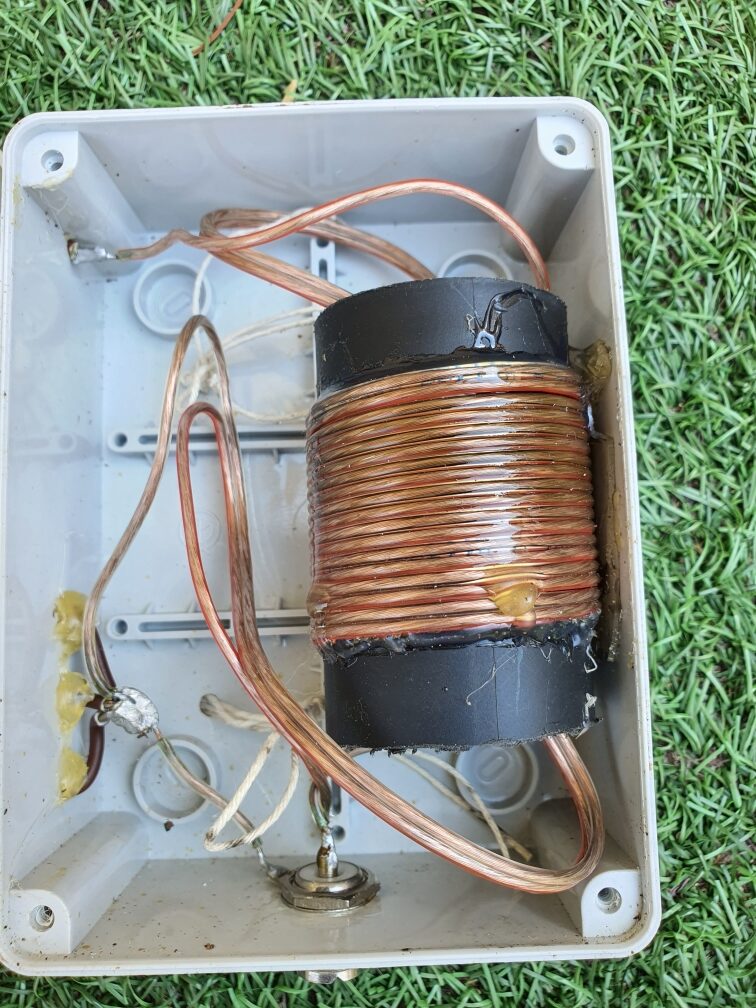
Making the coil UN-UN 4:1
Make an hole in the PVC tube to let pass the audio cable used to make the coil; be sure to wrap tight the coil until reaching the lenght of 1.50 meter cable… this lenght is not critical, but better to make it right !
Making the antenna
- Make an hole in the upper side of the plastic box for the vertical radial, and make 3 holes on the lateral side of the box for the ground radials. Then makes a fifth holes on the lower side of the box for potentially rain trouble.
- Mount the SO239 on the lower panel of the box.
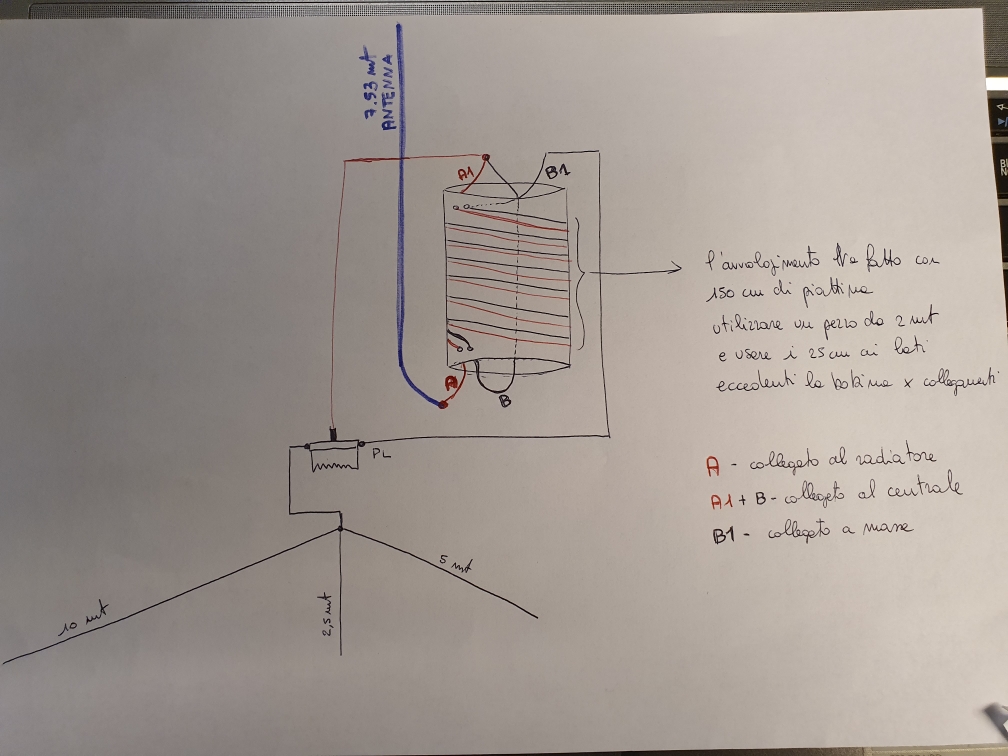
- Now consider the side IN of the coils as A and B, and the side OUT of the coild as A1 and B1 (in the exit of the tube). Pond the vertical radial (lenght of mt 7.53) to the A. Let pass the B in the internal side of the tube and pond it to A1, and together with the central PL.
- Pond the 3 radials together to B1, together also with the PL ground.
- Be sure about the lenght of the 3 radials… must be considered as total lenght, until the pond point, so please consider also the part inside the box.
- Make a test to be sure that the PL got properly ground; now close the box, you are almost ready for the smoke test.
Build up !
Fix the vertical radial of 7.53mt to the fishing rod using electrician clamp and scotch tape; a nice suggestion it is to put the clamp right after when a new rod section beginn, in this way the rod will not close on itself. Cover the clamp with the scotch tape to avoid sun damage.
When the rod is completely extended fix the plastic box to the rod. Finally fix the rod (I should say the antenna now); for limitated time of use (few hours up to a couple of weeks) you can use elastic strings; your new antenna it is very light, and it is so easy to fix just with one elastic string !!! I love this part of the job, beacsue normally every otyher antenna is heavier than this one, and should need more works to fix !
Finally put the 3 radials as much straight you can and fix them ( I also use in this case elastic strings) to everything you have around, avoiding metallic material…
To be honest, during my last activation from Tavolara Island, I fixes two radials to an elastic string, and then to a metallic net …. the radial was NOT directly on the net, but quite close….the result was that everybody was telling “Hey, nice signal….”
My tip: PLEASE don’t became crazy to look for the perfect installation…. test the antenna where you are, put the rod upright, put the radial at the best and start the engine ! You will be HAPPY !!